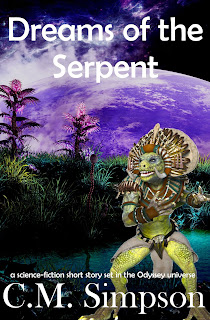
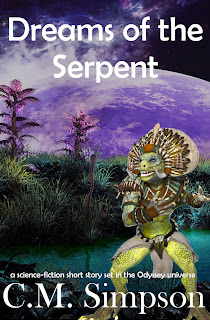
This cover only shows part of the entire river image by Melkor3d
at Dreamstime, and the artist has quite a number of other evocative landscapes
that would make suitable book-cover backgrounds… or for other projects.
Because I’ve worked on a number of these short story covers
now, the branding is fairly settled, so I can prepare the title, background and
byline quite easily. I use Berlin Sans FB for the title, and Baskerville
Oldface for the byline – and GIMP for the cover creation. The process is the
same I use for Carlie’s titles, where I firstly create a black background and then add the words.
In this case, I had to import the river landscape as a
layer, using the ‘Open as Layers’ option in the ‘File’ tab drop-down. Once it
was imported, I resized it to cover the cover, and then used the ‘Move’ tool in
the Toolbox to position it so the portion of the image that is seen is what I
wanted on the cover.
Once I was happy with the background image, and its
positioning, I used the ‘Autocrop Image’ option in the ‘Image’ tab drop-down to
take away the parts I hadn’t used, eliminating overhang. I then opened up the lizardman image which I sourced from Junichi Shimazaki, also at Dreamstime.
Even though this image was on a white background, I still
needed to remove that background, so I saved the image as a new document, using
the same file name, but adding ‘isolated’ to it, and then went through the
process for isolating the lizardman from its white background. As soon as that
process was complete, I closed the new image, and then opened it as a layer in
the cover image window.
Once again, I used the ‘Move’ tool from the Toolbox to
position the lizardman on the cover, and then I used the ‘Autocrop Image’
option from the ‘Image’ tab menu to trim the cover.
As soon as this was complete, all I had to do was adjust the
cover as a whole. TIP: If you want to adjust just one image on the cover,
highlight the layer the image is in, and then work while that layer is
highlighted (although, on a bad day for GIMP, you might need to work on the
image as a separate entity, and then import it). If you want to adjust the
entire image and its components, you need to highlight the background layer and
work while it is highlighted.
For this image, I decreased the brightness bot negative 61,
and then increased the contrast to positive 26, using the ‘Brightness-Contrast’
option on the drop-down menu under the ‘Colors’ tab.


The final cover looks like this:


No comments:
Post a Comment